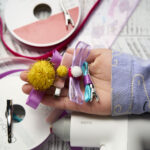
Learn how to make bow hair clips with step-by-step instructions. We use ribbon and a hot glue gun to make these easy DIY bow hair clips.

We're here with lots of pictures to show you how we made these super cute DIY bow hair clips. My little crafter designed these, and more or less made these all by herself.
She came up with these hair clips to make with her friends at her crafting birthday party earlier this year. We gave each kid a bundle of pre-cut ribbon and hair clips, and they all made their own.
Supplies and Equipment for DIY Bow Hair Clips
- Hot glue gun
- Scissors
- Alligator hair clips
- Assortment of ribbons
- Pom poms or other embellishments (optional)
What hair clips to use?
I like alligator hair clips for my kid's hair. I find that they stay put for an entire day at school.
If you want a softer feeling clip, these snap hair clips also work well. They have a flat round glue pad, a perfect spot for the ribbon bow.
What ribbons to use?
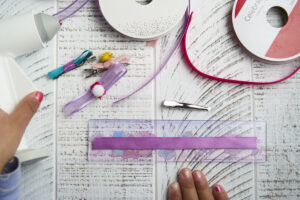
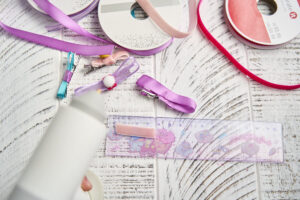
My little crafter picked out the ribbons in the photos. We used an assortment of ribbons with different textures and materials, including satin, mesh and velvet.
We found that ⅜ inch ribbons worked great for us. For reference, the two purple ribbons in the photos are ⅜ inch.
Use any material ribbon you like. However, be aware that different materials will respond differently to the heat from a hot glue gun. The velvet ribbons sort of crinkled with the heat from the hot glue gun. But the satin ribbons weren't bothered by the low heat hot glue.

How to Make DIY Bow Hair Clips
The DIY bows were easy for my little crafter to make. My four-year-old was able to do the majority of the steps, with just a bit of help from me at the end. Here she is showing the step-by-step process.
Cut the ribbon for the bow
We cut each ribbon strip about 6 inches (16 cm) long. There's no need to be exact.

Glue the ribbon into a loop
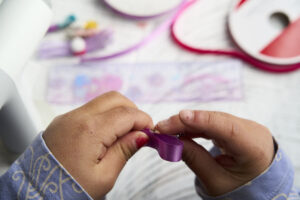
To start the bow, we'll glue the ribbon into a loop. Place a drop of hot glue at the end of the ribbon. Then, glue the ribbon into a loop with the ends overlapping a bit.


Glue the ribbon loop into a bow
Next, add a drop of hot glue on the inside of the ribbon loop, right where you previously glued the ribbon ends together.
Press the top of the loop down on the hot glue dot, forming a bow. Try your best to center the glue so the two bow loops looks equal on both sides.
It's okay if the ribbon crinkles a bit with the hot glue. This might happen depending on the material of the ribbon and the temperature of the hot glue.


Glue the bow to the hair clip
Place a drop of hot glue on the middle of the hair clip, then glue the ribbon bow on.


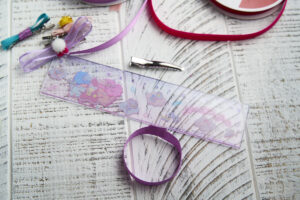
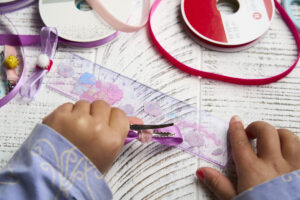
Cut a small strip of ribbon to wrap the bow
To give the bow a bit more structure and stability, we use a small strip of ribbon to wrap around it. The ribbon can be contrasting, or the same ribbon. You can see both examples in the photo below.
Cut a small strip of ribbon about 1.5 inches (4cm). The ribbon should be long enough to wrap around the top of the bow, and meet together underneath at the alligator teeth. If you end up with extra ribbon after wrapping and gluing, simply trim off the excess.

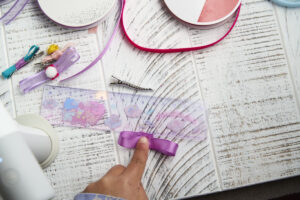
Wrap the short ribbon around the center of the bow
My little crafter found it easier to wrap the short ribbon around in two steps. This is what you see in the photos.
First, she put a drop of hot glue to the top of the bow to secure the shorter ribbon on. Next, I helped her wrap the ends of the short ribbon around the alligator clip and glue it inside the open clip.
This is the trickiest step of making these DIY bow hair clips. You need one hand to keep the alligator hair clip open, and a second hand to glue the short ribbon around the open teeth.
Alternatively, if the hot glue is causing your ribbon to crinkle a bit, don't put the drop of hot glue on the top of the ribbon. Simply wrap the short ribbon around the alligator teeth and secure it underneath with hot glue.
You can see in the photos that the velvet pink ribbon crinkled slightly with the hot glue. It's okay though, she had a solution to cover up the crinkle.


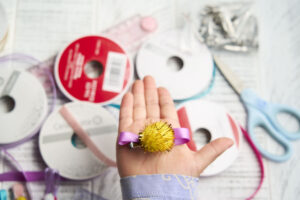
Add any additional embellishments
Last, she added a sparkly pom pom in the middle of the bow. A pom pom is always a super fun detail. Adding on a charm also works.
Plus, it covers up any imperfections, such as ribbon that crinkles with the heat from the hot glue.

Have Fun Making DIY Bow Hair Clips
We really hope you enjoy making these DIY bow hair clips! If this step-by-step tutorial helped you or your kid make these clips, I'll share any messages you leave below with my little crafter.

How to Make Bow Hair Clips
Equipment
- Scissors
Ingredients
- alligator hair clips
- assortment of ribbons
- pom poms or other embellishments
Instructions
- Cut a strip of ribbon about 6 inches (15 cm) long.

- Place a drop of hot glue at the end of the ribbon. Then, glue the ribbon into a loop with the ends overlapping a bit.
- Add a drop of hot glue on the inside of the ribbon loop, right where you previously glued the ribbon ends together.Press the top of the loop down on the hot glue dot, forming a bow. Try your best to center the glue so the two bow loops looks equal on both sides.
- Place a drop of hot glue on the middle of the hair clip, then glue the ribbon bow on.
- Cut a small strip of ribbon about 1.5 inches (4cm). The ribbon should be long enough to wrap around the top of the bow, and meet together underneath at the alligator teeth.
- Put a drop of hot glue to the top of the bow to secure the shorter ribbon on. Next, wrap the ends of the short ribbon around the alligator clip and glue it inside the open clip.Alternatively, if the hot glue is causing your ribbon to crinkle a bit, don't put the drop of hot glue on the top of the ribbon. Simply wrap the short ribbon around the alligator teeth and secure it underneath with hot glue.
- Add any additional embellishments, such as a pom pom to the middle of the bow.
Notes


Leave a Reply