You can make gorgeous rolled hem napkins using a serger (overlocker). Rolled hem napkins make a beautiful gift, and is perfect for a beginner project.

Rolled Hem Napkins
I made these rolled hem napkins and gave them to my friends and family this past year for Christmas. Time flies and I'm really delayed sharing these. I missed posting about them before the holidays, but they are good to make year round.
Friends and family loved them as presents. And maybe I'm biased, but I think they turned out gorgeous. I am really proud of myself for making them, and for gifting handmade present too.

Equipment and Supplies to Make Rolled Hem Napkins
Here's what I used and to make these rolled hem napkins.
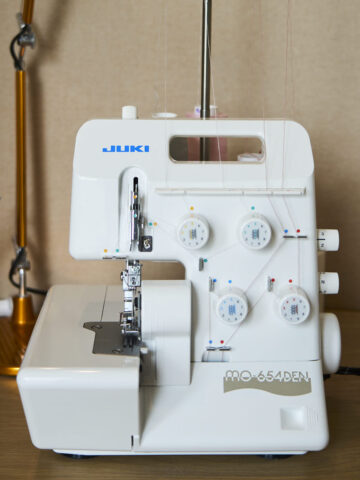
- Serger (Overlocker)
- Fabric (preferably cotton, linen or a blend)
- Woolly Nylon thread (upper looper only)
- Serger thread
- Fray Check
Find a fabric you love
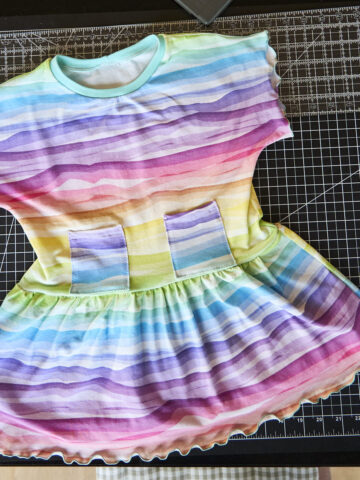
The rolled hem napkins you see in the photos are made from 100% cotton flannel. Flannel is a perfect material for dinner napkins. It's thick enough to wipe away any spills, and it's soft enough to feel luxurious. In addition, flannel also gives a modern casual vibe.
To be more eco-friendly, I specifically shopped dead stock fabric when I sourced the fabric to make these rolled hem napkins.
Deadstock fabric is leftover fabric from other fashion brands. Companies sometimes over estimate their needs, and instead of throwing away the fabric, they sell them off as unbranded deadstock. One of my favorite places to find quality deadstock fabric is Marcy Tilton. It's where I found the flannel in the photos.
You can make rolled hem napkins with a variety of fabric, but I would recommend sticking to cotton or linen.
Using Woolly Nylon for rolled hems
To make a rolled hem that fully covers the edges of the napkins, it's important to use Woolly Nylon thread in the upper loopers. Woolly Nylon is really stretchy, and puffs up a bit after you sew with it. As such, it provides good coverage over the hem.
I made cloth napkins using Woolly Nylon in a couple of different colors. While I love the colorful rolled hem borders, I found the dark grey thread worked best to mask any visible pokies coming through since it matched the bottom color of the fabric.
My favorite is Woolly Nylon by Y.L.I. It's a specialty thread, but totally worth it.

What size napkins to make?
I made these rolled hem napkins as 16" x 16". I find this size to be perfect for home cooked meals. 16" x 16" napkins are often labeled as lunch napkins.
This size worked great for buying fabric too. One yard of fabric that is at least 51" wide will cut nicely into 6 napkins.
Because the serger trims the fabric edges as it sews, I included extra seam allowance when I measured and cut the fabric. I cut 16.5" x 16.5" squares, and trimmed off ¼" as I serged the rolled hems.
In case you want to make bigger rolled hem napkins, dinner napkins are usually around 20" x 20". Formal dinner napkins can be even larger at 22" x 22". Just remember to add some seam allowance when you cut your fabric.

How to Make Rolled Hem Napkins
Making these rolled hem napkins is very straight forward once you pick out the fabric and thread color.
1. Cut the fabric
Cut the fabric to your desired napkin size, plus a bit of extra (I made 16" x 16" napkins and cut my fabric to 16.5" x 16.5" squares).
2. Set your serger to rolled hem setting
Set your serger to the rolled hem setting following your manual. Test scraps of fabric to fine tune your thread tension so it works for your fabric.
For my flannel fabric, I used the following settings:
- Upper looper: 3 (threaded with Woolly Nylon)
- Lower looper: 9
- Right needle: 4
- Stitch length: 1
It can be tricky to determine the correct tension needed for your fabric. If the tensions are not set correctly, you might see a lot of pokies coming out through the rolled hem. Using Woolly Nylon thread will help minimize the pokies, but you still need to find the correct tension settions.
Start with the settings recommended in your serger manual. Then keep doing micro adjustments until you find the correct setting for your fabric.
3. Serge around the entire border of the napkin
There are two ways to serge a rolled hem around the napkins. I tried both ways, and I prefer the second method I describe below, but it is more difficult to perfect.
Serge off each edge
The easiest way is to serge rolled hems straight across each side. Simply serge straight off each side. You'll serge four straight rolled hem borders.
Turning corners when serging rolled hem
It is a bit trickier to do a rolled hem around a corner, so it might take a bit of practice to get it perfect. I think this method looks better, but it took me a bit of practice using scrap fabric.
First, trim a rectangle off each corner of the fabric, like shown in the photo below. The length of the fabric trimmed should be the distance from the knife blade to the needle. The width of the fabric trimmed is simply the seam allowance you are using (I used ¼").

Serge all the way until you are about .5 mm - 1mm from the edge of the fabric. Slow down or use the hand wheel as you approach so you don't serge too far.

If the needle is down when you stop, turn the hand wheel to raise it slightly. With the needle raised, lift the presser foot and rotate the fabric 90 degrees. Rotating the fabric will loosen the threads slightly, so tug each of the threads back up (pull up where the thread goes through the telescopic rod), to remove any slack. Lower the presser foot and continue to serge.

4. Use Fray Check to secure the end(s)
If you are serging around the corners, when you reach where you started, use the serger knife blade to trim off the starting thread tail. Hold the thread tail straight across to allow the knife blade to cut it off.
Use a drop of fray check at each corner where you serged off the ends. If you serged off each end, then you'll need Fray Check at each corner. If you serged around the corners, you'll need Fray Check for just one corner.
The Fray Check will absorb nicely into the Woolly Nylon. After the Fray Check has dried, about 30 minutes, cut off the thread tail.

Serger Rolled Hem Napkins
That's it! I found it very rewarding to make sets of rolled hem napkins.
Then, I designed and printed out the labels, and tied them on using ribbon and fabric scraps. I loved making these rolled hem napkins for my friends and family. It's a great project if you are new to using a serger.

Any questions? Drop it in the comments below and I'll try to help the best I can.


Leave a Reply